If you’ve ever been on a project where the electrical breakers would be constantly tripping and lighting was at a minimum, don’t worry you’re not alone. Temporary mechanical and electrical systems are the heart of any construction site and if they go down so does your productivity. So what are temporary mechanical and electrical systems and why are they so important?
Temporary electrical systems are infrastructure that is put in place to feed your jobsite until the permanent services can be brought in. Their purpose is to feed the jobsite so that the workers are able to perform regular tasks.
People often take going to the bathroom or charging your tools for granted, but when they aren’t around it slows work down dramatically. We’re going to cover the following topics to ensure that you have a complete understanding of them on your jobsite:
- What are some examples of temporary electrical systems on a jobsite?
- Basic concepts for temporary electrical systems
- Who should be involved in preparing a temporary electrical system?
- What are the steps involved in getting a temporary electrical system in place on a jobsite?
- How much does a temporary electrical service take to install?
- Key equipment and materials requiring temporary electrical services
- Key equipment and materials for providing temporary electrical services
- Challenges and professional tips for your project team
Building a project without a temporary network is like building a structure without concrete, it doesn’t happen. So let’s find the right way to do it!
What are some examples of temporary systems on a jobsite?
Electricity on a job makes things work, from the lights that keep spaces bright to the battery chargers for your drill. If it doesn’t exist it’s very difficult to build anything. Below are just a few examples of temporary electrical infrastructure on a jobsite:
- A generator feeding the lights and power on a remote jobsite
- Installing a temporary breaker or panel to subfeed a consruction site off of an existing service
- Temporary lighting stringers plugged into a existing outlets in a building
- Solar panels feeding a temporary charging station for tools
- Temporary electrical panels installed throughout the
As you can see, temporary systems range from very basic concepts to large networks feeding hundreds of pieces of equipment.
There’s alot that goes into creating a temporary plan and network on your project. At no point should you be doing it alone. Input from all of your trades and co-workers is important to make sure that you’re not missing anything.
This article isn’t intended to explain everything about electrical design to you, but it is intended to give you a strong understanding of how to plan your temporary electrical network on your next project.
Basic Electrical Concepts
Electricity is measured and discussed in Amps, Volts, and Ohms with each having a critical role to play. We won’t go into too much depth but we found a great analogy online:
Voltage is measured in volts, current is measured in amps and resistance is measured in ohms. A neat analogy to help understand these terms is a system of plumbing pipes. The voltage is equivalent to the water pressure, the current is equivalent to the flow rate, and the resistance is like the pipe size.
Often in construction you won’t hear much about resistance (that’s typically designed by an engineer) but you will hear people discuss equipment in volts and amps.
For a full walkthrough on the concepts we’ve found this article to be great at explaining it.
In order to start your temporary electrical plan you’re going to need a number of pieces of information:
A schedule – your temporary power requirements are going to change throughout construction. What you need at start up might be more or less then you need later on in the project. The other question you need to ask yourself is how long will you be on temporary power for? Will you need to run new equipment off of it or will the new building power be up before you start commissioning? Not sure how to schedule? We can help.
Logistics Plan – consider how you are getting material up and down the building, where deliveries will be? What are the pieces of equipment you will need to perform different activities. Have a read through our article on construction start up for a better understanding of items you might need at start up.
Trade Input – what power will each of the trades need? A floor grinder might have a power requirement of 600V 100amps where your fans might have a power requirement for 120V 15A. Each piece of equipment needs to be reviewed as this will dictate what power you take to where.
There’s never such thing as having too much information when planning this type of work.
Once you have an understanding of the different concepts of electricity and the above information we recommend you grab a floor plan of your building.
Temporary Electrical – Feeding The Beast
Start by identifying the source of power for how you will be feeding the project site. If you’re in an existing building and can use the power from it, good start. If however, you’re in the middle of a field and need to bring power in to the project you may need to bring in a generator. In order to figure out the sizing of the source you’ll need to pull in the list of equipment you and your trades will need and add it all up.
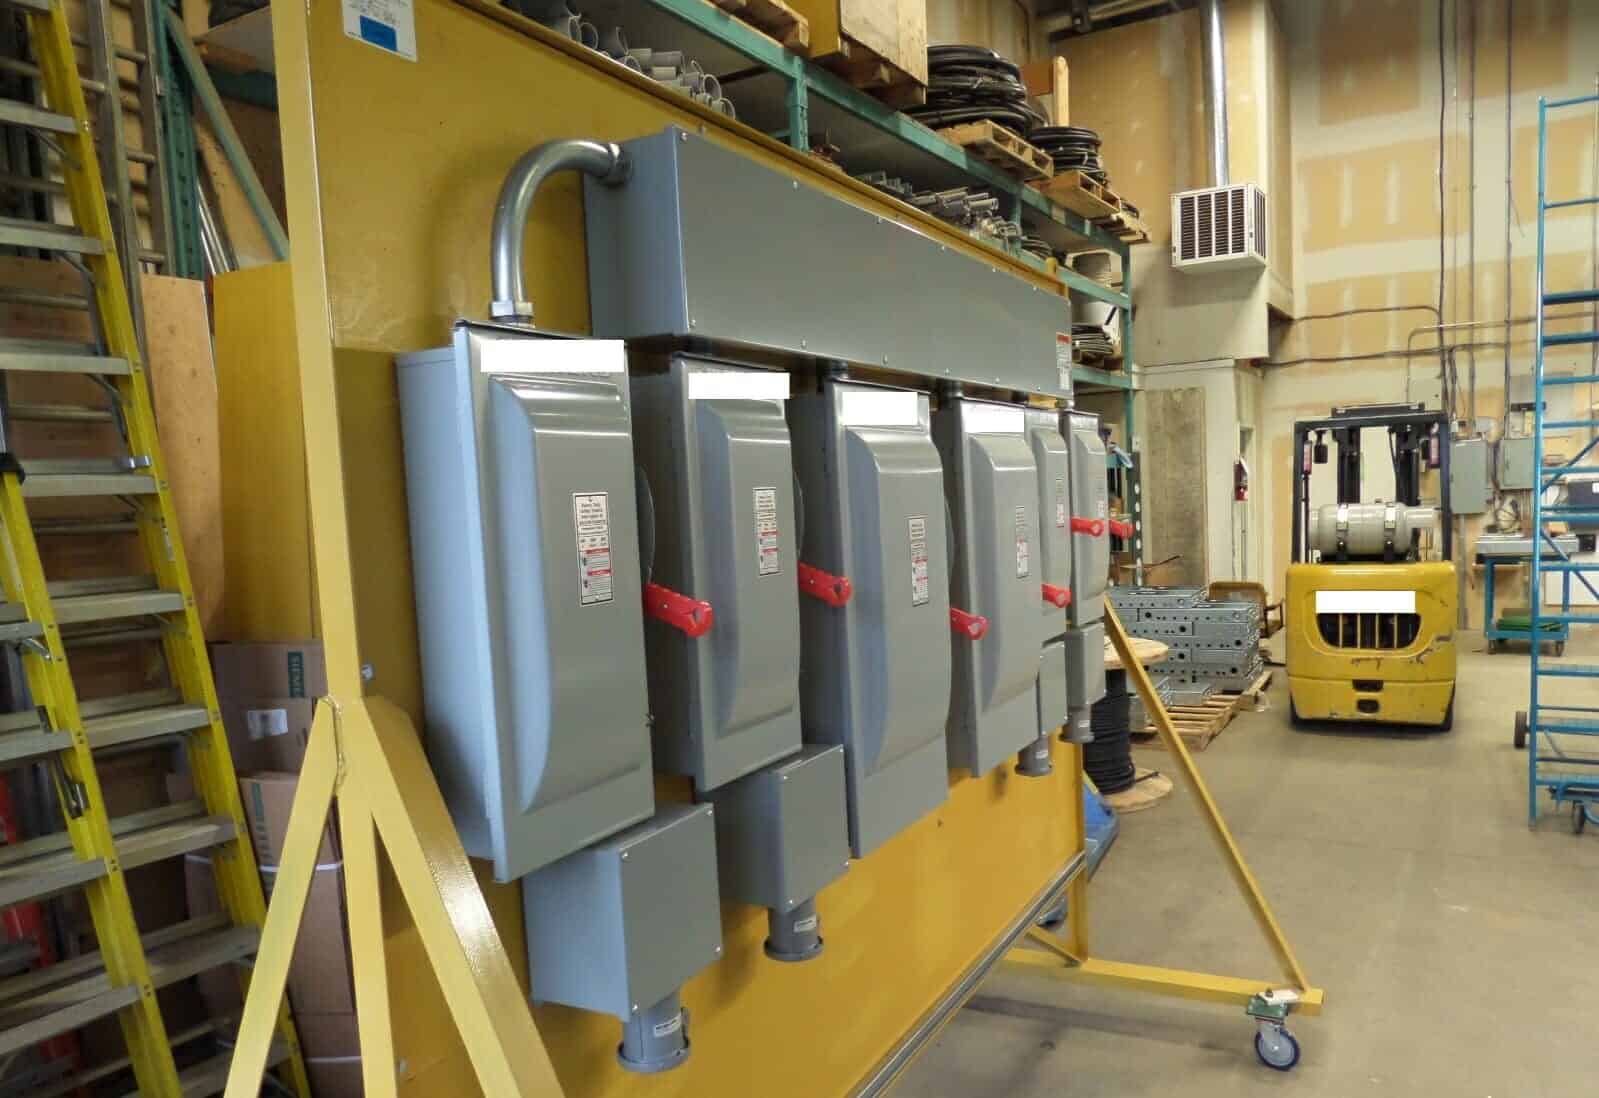
Once the source has been determined it’s time to start feeding the job site. Larger companies have pre-fabricated temporary panels but if you’re a smaller outfit you’ll have to have your electrician make up some temporary panels. As a recommendation we suggest building panels with a disconnect connected to an electrical panel feeding a series of outlets mounted to a backboard. Another suggestion would be to install these on wheels so that they can be easily pushed around the job.
These should be distributed around the jobsite as needed, the frequency of them will be dictated on how much activity there is in a specific area. For example a mechanical room that has a significant amount of demolition and welding would require much more power then an open office area that needs to have a ceiling, carpet and walls installed.
Mark all of your small locations down on the floor plan.
Temporary Electrical – The Heavy Lifting
Once you have the jobsite fed for small equipment with your temporary panels it’s time to identify the bigger load equipment. Some examples of larger equipment which may need to be indepentely fed are:
- Tower crane
- Welding machine
- Floor grinding equipment
- Concrete pump
- Sprayed fireproofing pump
- Elevators or hoist equipment
- Temporary electrical heaters
- Chipping guns
There are alot more examples, but each of these will likely require independent electrial feeding them.
Mark all of these down on your floor plan.
Bring On The Lights!
Lighting is important on a project and you don’t want to forget it. Not only is it a safety requirement but having more light also increases productivity for workers. We recommend keeping your lighting feeds seperate from your construction power feeds. This way if your breakers trip for your panels it won’t put your building into darkness.
A big part of temporary lighting of a building is the actual fixtures you’ll be using. Everyone’s least favourite way of lighting a project is the classic light stringer. Always damaged, never safe and always in the way. Other options can include high bay light fixtures or fixtures such as wobble lights.
Mark all of the lighting locations down on a floor plan, and the panel locations you’ll use to feed them. In general you typically want to feed around 45,000SF of space off of one panel.
Putting It All Together
Once you have your floor plan with the locations of each of the above start by laying them out on a riser diagram. The wiring to each of the pieces of equipment will be critical for your material orders. Add each piece of equipment to the drawing and the source, then start drawing a line between it and the panels.
At this point in the process you may need to bring in an engineer to help you with the design, many panels can likely be fed off of a single line. Make sure to have someone sign off on the overall strategy and design.
Once you have the final design it’s time to start installing, when you’re planning it you should be looking at your constraints. Things like elevators can limit the size of equipment you bring into a given space.
Make sure to hire a qualified electrical contractor to install all of the equipment on your project. Once the equipment is installed they will need to bring in an Electrical Safety Authority to sign off on the installation. There may be a maintenance requirement for your equipment (ie monthly inspections), make sure this is followed.
Finally, remember that things change on a job site.
Don’t expect to install this and leave it the same the whole time. It will need to be modified as trades come on board and leave. Include some contingency in your plan for those inevitable surprises that will come up as you go.
Do you have any temporary electrical ideas for your jobsite that are creative? We’d be interested in hearing about them so feel free to share them below!